|
About Us
Middle School
Elementary School
Preschool
Current School Families
Support Our School
Visit Our Church
|
Excel Basics - Lesson 2
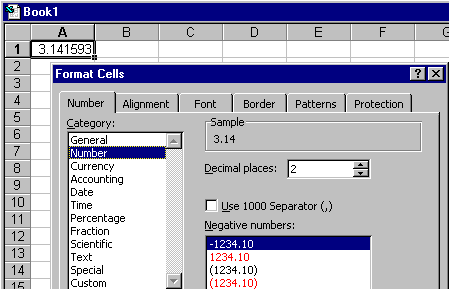
Lesson 2 is all about formatting of cells. To format cells, choose Format
> Cells from the menu. This opens the cells formatting dialog
box. As you can see from the sample below there are 6 tabs for
formatting cells:
I
- Number - This tab lets you select the type of number that will
be in a cell from a pre-defined list or lets you design your own
format for numbers in a cell.
- Alignment - This lets you align the data in cells both
horizontally and vertically and lets you change the orientation of
text in a cell
- Font - This works like the font selections in a Word document
- Border - With this tab you can add borders to cells and add
diagonal "borders" into a cell
- Patterns - This is where you can change the background color
and/or pattern of your cell
- Protection - This tab lets you protect data from being changed
by someone else and can also hide data
Now let's play with these options to help understand them better. Open
Microsoft Excel and in a 5 x 6 grid (cells A1 through E6) do the
following:
-
Change
the background color on at least 6 of the cells.
-
Type your whole
name (first and last) in 3
of the cells and align each cell differently: one cell to the
right, one to the left and one centered. Expand the width of the
column if needed to see your whole name.
-
Add a patterned
background to 2 of the cells.
-
Enter the formula =5/20
in one of the cells and have it display as 25%. Hint: Use Format >
Cells > Number to change to a Percentage
-
Add 5 different
borders to 5 different cells: border on left, border on right,
border on bottom, border on top and a red box
-
Using the border
tab put an X into one of the cells as shown below. Do not just
type an X!

-
Type the word Cell
into 2 cells. Change the font to a different font than you used
for your name in step 2.
-
Label any remaining
cells with their cell address. At this point there should be
something in all cells from A1 through E6
-
Save your workbook as
YourName - Excel2. For example, John Smith would
save as John
Smith - Excel2.
Go to Lesson
3
|

